There are many workbenches available on the market. But sometimes, why would a woodwork enthusiast buy a very expensive workbench anyway? If you want your DIY workbench to be a work of yours, you are at the right place. We will learn how to DIY a workbench in a step-by-step tutorial.
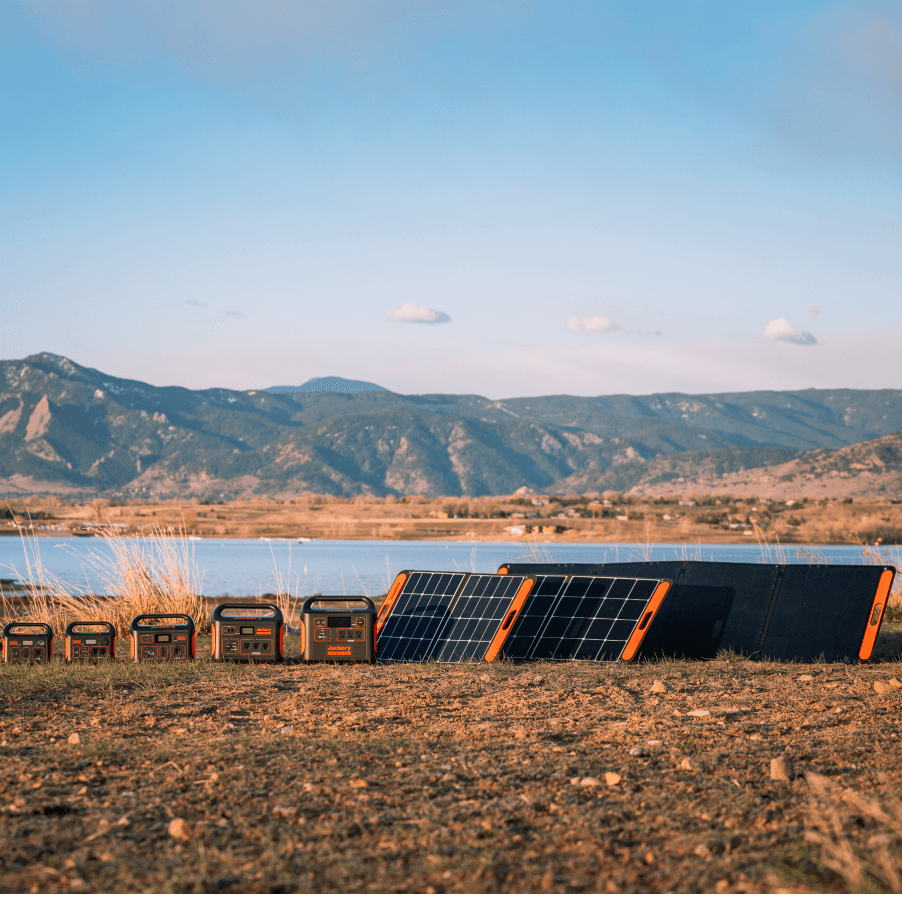
We also recommend harnessing the power of solar energy to run your tools so that working outdoors does not restrict you from experimenting. The Jackery solar generators are compact, lightweight, and weather-resistant, so you can travel with them or use them even in harsh weather. Its advanced battery management system and quick charging allow it to power all your appliances without any risk of fluctuation, overheating, or overcharging.
What Tools & Materials Do You Need for DIY Workbench?
A DIY workbench is a beginner-level project and thus requires very basic tools and some readily available materials. When you want to make a DIY garage workbench, you already have all the tools and materials; if you don't have them, you will have to procure them anyway.
So here is a quick list of all the materials and tools required for a DIY workbench. Additionally, a Jackery solar generator in your workshop or garage helps you immensely with all your power requirements, even when the grid is down. The other scenario in which you would love to have a solar generator is when you are trying to go off the grid.
The Jackery solar generator 3000 pro and 2000 plus are perfect for a garage workshop because they have enough high power to run your tools, lighting, and other appliances needed. Also, they come with multiple AC and DC ports to interface multiple devices simultaneously.
|
DIY Workbench Tools & Materials |
|
|
Tools |
Material |
|
Circular Saw |
1-5/8-in. drywall screws |
|
Cordless Drill |
2x4s |
|
Miter Saw |
3-in. drywall screws |
|
Safety Glasses |
4 x 8 x 1/2-in. plywood |
|
Straightedge |
|
|
Tape Measure |
|
What to Consider Before DIY Workbench?
As they say, you plan to fail when you fail to plan. Similarly, there are certain factors that you need to consider before launching your DIY workbench project. These factors determine the usability, productivity, and ease of use.
1. Simple and Practical
Remember that your first DIY workbench project is a training project. It should be very simple and take 1-3 days to make. Also, it should use very simple tools and materials. Once your workbench is ready, you will start using it and gradually understand what you want in your dream workbench.
2. Construction-grade Materials
This point is also a continuation of what we discussed above. Your first DIY workbench is your learning project, so it is better to use economical construction-grade materials. Eventually, if you make mistakes, at least they are not expensive.
3. Adjust Height
Your workbench height is directly related to how productive you can be with this workbench and how easily you can work on it. Your bench should be as tall as your table saw, if not lower. Because if your table saw is lower than your benchtop, you will be restricted by your wood size.
How to DIY Workbench
The following is a quick tutorial on how to make a budget DIY workbench. This simple bench has a top surface for working and a lower shelf for keeping your tools handy. The detailed tutorial is available on the family handyman website, but we are only presenting a quick glimpse. Let's start.
|
Time |
Complexity |
Cost |
|
An hour or less |
Beginner |
$51-100 |
1. Cut your wood pieces and start assembling the frames for the bench surface and the lower shelf. Assemble the Workbench Frames.
2. Attach the legs to the surface frame.
3. Attach the lower shelf with the legs.
4. Now, cover the frames with the plywood work surfaces.
5. This is the time to build your top shelf. First, make the ladder-like top shelf frame.
6. Add the plywood to the top shelf frame.
7. Attach the legs of the top shelf to the frame.
9. Add the backer boards.
Jackery Solar Generators for DIY Workbench
The Jackery solar generators greatly support your workbench project and your next projects. These solar generators are compact and noise-free, so you can take them anywhere you want and keep using your electric appliances without dependency on the grid. The Jackery solar generator range has a wide range of products with large to small capacities that can be used according to the requirement.
We recommend the Jackery solar generator 3000 Pro and 2000 Plus. These are medium to large-capacity generators with multiple ports so you can connect multiple devices simultaneously.
Let us enlist the basic tools on your workbench and their wattages to make decision-making easy.
|
Appliances |
Minimum Wattage |
Maximum Wattage |
|
Circular Saw |
1200 |
2400 |
|
Drill |
720 |
1800 |
|
Edger |
960 |
2400 |
|
Jig Saw |
720 |
1800 |
|
Miter Saw |
840 |
2100 |
Jackery Solar Generator 3000 Pro
The Jackery solar generator 3000 Pro has a large capacity of 3024 Wh so that you can run almost all your power tools on your DIY workbench. You can charge your cellphone and laptop while running your chainsaw or drill. Additionally, the Jackery solar generator 3000 Pro has a very quick charging rate and only takes 3 to 4 hours for full charging using solar panels and only 2.4 hours with an AC outlet.
Jackery Solar Generator 2000 Plus
The Jackery Solar Generator 2000 Plus is an expandable solar generator. So you can get the capacity in the range of 2,000 watts going up to 24,000 watts. It offers fast charging and provides fluctuation-free smooth electricity that ensures the safety of your tools and the environment against overcharging and overheating.

|
|
Solar Generator 3000 Pro |
Solar Generator 2000 Plus |
||
|
Capacity |
3024Wh |
2042.8Wh |
||
|
Battery Cell |
Lithium-ion Battery |
LFP (LiFePO4 battery) |
||
|
Cycle Life |
2000 cycles to 70%+ capacity |
4000 cycles to 70%+ capacity |
||
|
Dimension |
Length: 18.6in (47.3cm) Width: 14.1in (35.94cm) Height: 14.7in (37.36cm) Weight: 63.93lbs (29kg) |
Length: 14.7in(37.36cm) Width: 18.6in(47.3cm) Height: 14.1in(35.94cm) Weight: 61.5 lbs(27.9 kg) |
||
|
Recharging Methods |
AC Adapter: 2.4 Hours Car Adapter: 35 Hours Solar Panel:3-4 Hours |
AC Adapter: 2 Hours Car Adapter: 25 Hours Solar Panel: 2.5 Hours |
||
|
Output Ports |
AC Output(x1): 120V~ 60Hz 25A Max AC Output(x3): 120V~ 60Hz 20A Max USB-C Output(x2): 100W Max, 5V⎓3A, 9V⎓3A, 12V⎓3A, 15V⎓3A, 20V⎓5A |
AC Output(x5): AC Output(×4):120V~ 60Hz, 20A Max, AC Output(×1):120V~ 60Hz, 25A Max, AC Total Output,3000W Max, 6000W surge peak USB-A Output(x2): Quick Charge 3.0, 18W Max USB-C Output(x2): 100W Max, (5V, 9V, 12V, 15V, 20V up to 5A) |
||
|
Working Hours |
Circular Saw(2400W) |
1.07 Hours |
Circular Saw |
43 Minutes |
|
Drill(1800W) |
1.42 Hours |
Drill |
57 Minutes |
|
|
Edger(2400) |
1.07 Hours |
Edger |
43 Minutes |
|
|
Miter Saw(2100) |
1.22 Hours |
Miter Saw |
49 Minutes |
|
|
Customer Review |
Gary Sult [Verified Customer] "Great service and great products. This is our 3rd Jackery. We've been fortunate to have solid backup power during storm outages last year." |
Stephen Dudzik[Verified Customer] 2000 explore with 600 w of panels "So far, I was highly impressed with the quality of the equipment, the loan, and the excellent packing. Stephen thought the packing would make an excellent base for a Faraday cover." |
||
DIY Workbench Plans
A detailed DIY workbench plan will help you immensely by streamlining your work processes. Many workbench plans are out there, and we have selected the best yet easy-to-make projects.
Garage Workbench Plan

A garage workbench plan includes the basic working surface, large drawers, and a shelf. The work surface top also folds out to give you extra space. This project is perfect for smaller spaces and can be assembled within a day. You will only need a circular saw, drill, and jigsaw. The detailed DIY workbench plan is available here.
Folding Workbench

The characteristics of this workbench are folding and movable. This intermediate-level bench can be fixed in a small space because it is compact and can be moved easily on its wheels. The complete plan is available on the family handyman website.
Budget Workbench Plan
This DIY workbench plan is meant for beginners with low-level expertise and a limited budget. It is simple and sturdy, but no drawers, folding workspace, or storage is available. Find the detailed plan for this budget DIY workbench here.
Large Workbench On Wheels

Image Source: Designed by Freepik
This DIY workbench plan features a large top space and a bottom shelf. It is simple but sturdy, making it a perfect choice for beginner enthusiasts. The lower shelf allows you to bring all your tools beforehand and use them whenever needed. The detailed plan is available on the Shanty 2 Chic website.
DIY Workbench FAQs
1. What size of solar generator do I need for a DIY workbench?
A medium to large solar generator with a 2000 to 3000 watt-hours capacity. This power range is enough for running your tools and supporting requirements like lighting, fans, etc. You will follow these steps to get a customized statement of your requirements.
1. Add up the power rating of all your required equipment. You will find this rating on the product label or the work manual. Also, note the peak power requirement of each product.
2. Add the number you calculated above to the highest peak power from the list you made in Step 1.
3. This number is your power requirement that needs to be supported by the generator.
4. Now calculate the hours of support you will get from your generator.
Working time = Capacity Wh * 0.85 / operating wattage of your device
For example, assuming the power consumption of your workbench is 1250 Watts.
The Jackery Solar Generator 2000 Pro supported hours will be 2160Wh * 0.85 / 1250w = 1.5 hrs. The battery capacity is multiplied by 0.85 as there will be some form of power loss while charging the appliances.
2. Is it cheaper to buy or build a workbench?
You will find very cheap workbenches in the market; however, when you start working on them, you will feel the pain of their wobbly legs and the bad placement of tools. High-quality workbenches will be more expensive than a DIY workbench anyway.
3. What is the best wood for a workbench top?
The choice of wood for the workbench top depends on its proposed use. A hard maple top is best for woodworking because it is fine-grained, tough, and relatively economical.
Solid plywood or MDF is a good choice if more crafting and painting are expected because they are replaceable and economical.
4. How tall and deep should a workbench be?
An average workbench is usually 34″ – 36″ (86cm – 91cm); however, if you are tall or short, you may want to adjust the height.
Final Thoughts
A DIY workbench is a very versatile project. A beginner also aims to make a DIY workbench even in the early stages of her work. As they grow and mature, the high-level professional-level project will again be a more advanced-level dream DIY workbench. We have presented some very basic DIY workbench plans for you. Keep practising!


